Listening And Monitoring Rooms – 101
In our last narration, we discussed three major acoustical benchmarks that must be used in any listening or monitoring room environment. We discussed proper room sizes, side wall reflections, and low frequency resonances. In this discussion, we will focus on our reflection free/reflection minimized zone, comb filtering effects, and front and rear wall impacts on our listening or monitoring position position.
Reflection Free Zone
Our monitors must be set up in a way that creates a reflection free zone at the monitoring position. We must position our monitor speakers and monitoring listening position as the points of our reflection free triangle. The two left and right channel speakers form the two base points of our triangle and the listening position forms the point. Our acoustic goal is to slow all reflections down to a point where they do not have any sonic signature on the pure, direct sound from our monitors. This is what acoustic people call a reflection free zone.
Direct Sound
The direct sound from our monitors is the purest sound we can get at the monitoring/listening position. All of the music is in the direct sound without the room sound. The direct sound is the sound that comes straight at you from the speakers. The shortest distance between two points is a straight line and the direct sound travels on this straight line.
Listening Rooms
In our listening room environments, we want more of the room sound in our presentations. Our goal with our two channel playback systems is to try and recreate the original recording and its environment that it was recorded in. If it is a live recording in a small room, we want more room sound because that is what the music sounded like when it was recorded. In order to achieve this room sound, we allow more reflections in our presentations. We also may move the listening position back farther out of the reflection free zone triangle.
Wall Reflections
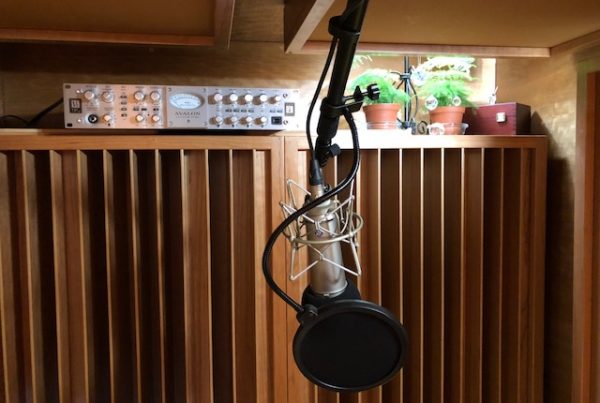
When wall surface reflections enter into and interlace with our pure direct sound, we get a different sound. The reflections represent the room and they interject their energy into the direct sound. We not only have reflections from the side walls which are the most noticeable. We also have reflections from the ceiling and front and rear walls. I guess we could even say that reflections from our console are part of room sound.
Comb Filter
Reflections from our console and any other physical object with the reflection free zone of our listening or monitoring position can create a comb filter. The best way to explain a comb filter response is to think about sound energy striking an object and then hitting another object. The reflections bound back and forth between these objects and create there own “sound” or rather cover or smother some of our sound energy. This phenomenon is especially harmful to our middle and high frequencies.
Signal Coloration
Comb filters can mask certain frequencies partly or completely. They can interfere with an accurate mix and result in a coloration to the mix on play back. We have to be careful with the console and any reflections that may bounce off of it into our ears. These reflections produce distortions that we hear and the less room sound in our mix the better.
Listening Rooms Comb Filters
In our listening rooms we have to be careful with equipment positioning and set up. I see a lot of equipment set up between the left and right channels. This produces a comb filtering effect when sound energy bounces off the equipment rack and back into the listening position. There is also a comb filter effect from equipment and the front wall. Energy can get trapped in this small space and produce unwanted coloration.
Cumulative Effect
One may not hear this isolated situation immediately but a series of these situations can add up to a noticeable sound difference in our presentations. If we have an equipment rack, comb filter going on and then another one with say a coffee table in front of our listening chair, the cumulative effect of both of these can produce audible distortions at our listening positions. One small one by itself may not be audible, but they do add up and are especially troublesome with our middle and high frequencies.
Control Room Front Walls
Our front walls in our control rooms are a source of reflected energy. The front wall will produce reflections from energy that is generated from our monitors. Remember, energy is generated from a 360 degree pattern around our monitors. Those front wall reflections bounce back to our monitoring position and mix with the direct sound from our monitors. Our goal at the monitoring position is to minimize these reflections because they contain room sound.
Front Wall Absorption Technology
Front wall acoustic treatment is absorption technology in our control rooms. We do not want any front wall artifacts interlaced with the direct sound from our monitors. Sound absorption technology is the preferred method to minimize front wall reflections in our control rooms. Don’t forget about low frequency issues in the front of our rooms. This is where our speakers are located, so we must deal with the speaker/room boundary issues that their energy produces.
Rear Wall Time Delayed Signal
The rear wall produces a time delayed reflection as it strikes the rear wall and then comes back to the monitoring position. This unwanted time signature from this rear wall reflection interlaces with our wanted, direct sound from our monitors. This rear wall reflection is full of room sound because depending on its distance from the monitoring position, it will also have a delay effect added into it.
Rear Wall, Control Room Treatment
Rear wall reflections in our control rooms can be dealt with using sound absorption or sound diffusion technology. Sound diffusion technology will take the rear wall energy and break it down into a series of smaller energies if you will which will not be so predominant at the monitoring position.
Diffusion is the preferred method for rear wall acoustic treatment because using more absorption may deaden the room too much.
Listening Rooms Diffusion
In our listening rooms, we want more room sound. We therefore treat the front and rear wall with sound diffusion technology. Quadratic diffusion can be used on both the front and rear walls to achieve a more realistic sonic playback presentation. We can position quadratic diffusors in vertical and horizontal positions that can generate a two dimensional sound field at our listening position.
Our control and listening rooms each have different acoustical objectives. In our control rooms, we minimize reflections at our mixing or monitoring position, so we can remove as much of the room from our recordings as we can. In our listening rooms, we want more room sound to add to the realism of our musical presentation. Each approach requires that the room be treated differently and that each room surface has a particular sonic impact on our final sound we hear in the room.