
Today we’re going to talk about do’s and don’ts of recording studio acoustic treatment setup. There’s a lot of misinformation out there, a lot of confusion. So let’s get back to basics and look at some of the main do’s to start with and then, later on, we’ll talk about the don’ts. We have updated this blog on 12/10/19 to reflect increases in knowledge and experience.
Do’s:
Decide on Your Goals First
What are you trying to achieve in this room and then we have to set the room up accordingly. Now you have to do some research. What are you trying to achieve? Do you want the front end of the live room? Do you want the back of the room dead? Do you want the back of the live room? Do you want the front end of the room more dead? What is the balance between diffusion and absorption? Those are our only two treatments that really that we have.
Sound Strategy
What are you trying to accomplish with the room? Each part of the room has to be taken into consideration because each part of the room and the associated treatment contributes to the sound that you’re going to get at the monitoring or listening position. If you have an absorptive front end, front wall and both side walls then you have a situation where you are minimizing the time signature of the reflections to focus on just the direct energy from the monitors. That’s probably a more analytical way to do it. It’s getting closer to a near-field situation with less room sound.
Find the Correct Set of Dimensions
There is a length, width and height ratio that’s critical to minimizing the low-frequency energy issues within your room. Almost any room regardless of size unless you get into the thirty, forty, fifty-foot dimensions is going to have some kind of low-frequency issue. Can we resolve all those issues by correctly identifying the width, height, and length of the room? No, but we can minimize the impact low-frequency pressure issues have on our volume and dimensions. We can find a good set of dimensions that will minimize those.
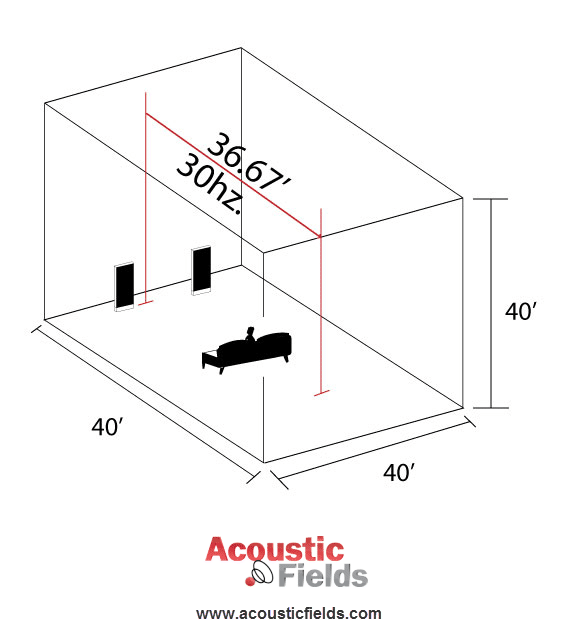
30 Hz. Wavelength
Proper Ratios
Why minimize them? Because it costs less. It might cost us a little more to get a little bit of a larger room than we planned, a foot or two here or there, but in the end, the treatment that we’ll have to use to minimize the issues caused by poorly selected room dimensions will be less. So it’s all about planning. You have to plan your goals for the room, what is the sonic signature of the room that you’re after and then let’s deal with the dimensions of the room so that we minimize the pressure issues, the reflection issues within the room and we have to use less treatment. Less treatment is less money.
Do Position Your Monitors Correctly
I see this all the time. There is a correct position for an energy-producing source within a room, a speaker, to minimize pressure issues. Finding that particular position is key and it’s not a position that’s necessarily going to look good in the room or is necessarily convenient based on your particular situation. The room defines where your monitors go, the room defines where your speakers go. You have some flexibility here but there is a position in your room for an energy-producing device, your speaker, to minimize its impact in the room.
The speaker and the room have to get along. They’re going to be married, they have to get along, okay. Now they’re not going to get along all the time. Sometimes the speaker is going to create too much energy within the room and the spouse is not going to be happy with that, the room. So it’s going to voice its disapproval and we’ve all been through that. The bottom line here is there’s a balancing act that you have to achieve and you have to look at these things ahead of time, they’re all part of planning. It’s much easier to move a line on a piece of paper an architectural drawing, than it is to move a wall already built. So give that some consideration.
Treat All the Surfaces of the Room
I see countless studios that simply don’t have the proper floor treatment or construction or don’t have the proper ceiling treatment. I think everybody realizes that the sidewalls, front wall, and rear wall need treatment. Those four planes if within a recording studio room are widely recognized as needing acoustic treatment but the ceiling and the floor are overlooked completely and those are the two reflections that technically reach your ear first.
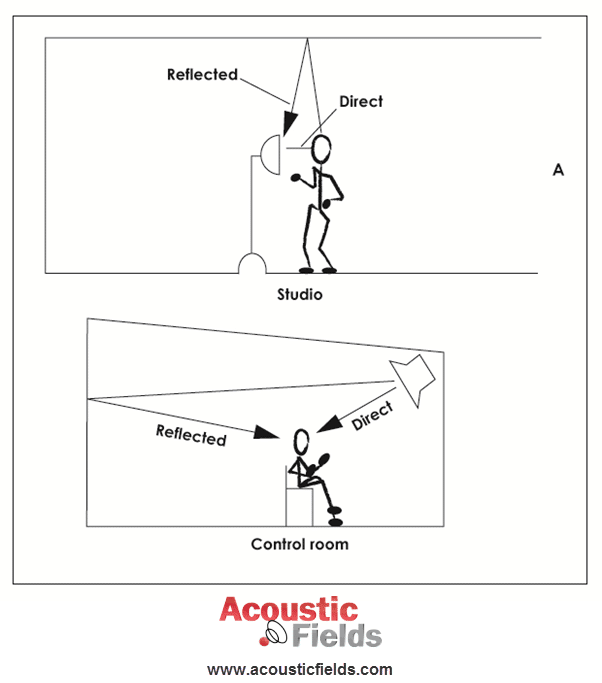
Ceiling and Floor
So we kind of overlook the ceiling and the floor material composition. So we want to treat all room surfaces so we have complete control, well as much control as we can, get within our rooms. So, do decide on your goals for the room. What are you trying to do? Are you mainly with classical recordings and you want that headphone analytic complete separation of all sounds so you can hear everything? Then you probably want a dead front end and a live-end rear end. If you’re doing other types of music maybe you want something a little bit different. But you need to decide on your goals for your recording room set up..
What’s the Correct Set of Room Dimensions?
I can’t emphasize this enough. If you don’t achieve this, and I see it every day, you’re going to constantly be working uphill to solve the issues and someday you just throw up your hands and go “well I guess I can’t get rid of that forty-cycle problem that I have because of my room dimensions”. So you work around it. In your working environment, you don’t want a situation where you’re working around issues within the room. Moving your head from side to side, standing up going behind the listening, position, and monitoring. I see that a lot, I don’t want that. A little bit of planning upfront goes a long, long way. Make sure your monitors are positioned correctly and do treat all room acoustic surfaces.
Do’s And Don’ts
1. Don’t Have Unequal Distances Between Your Monitors and Side Walls
I see this all the time. I saw a control room the other day where their left and right channels were positioned unequally with their seated position. So we had a very short distance from the right channel and a very long distance from the left channel, not to mention the fact that the right channels in a corner which we all know that that’s a big taboo. So at the listening position, the reflections from the sidewall are going to have unequal time signatures. So image, focus, sound stage, all going to be discombobulated if you will. So we want to have those monitors positioned so that the distances from the sidewall are equal, this is critical in your recording room set up.
There’s a nice position that you can have for this sound triangle of the left and right speakers within the room. This triangle can be positioned within the room to achieve a very smooth frequency response and that’s a good starting position. So keep the distances from the sidewall to the monitors the same. You need to keep the distances between your speakers and the listening position at the same distances in your recording room set up.
2. Position Your Monitors
That’s a situation that occurs with monitors in their field listening. If your console and speakers are too close together you have to realize that the energy is bouncing off the console and into your ears. So we want to make sure that the height of the monitors versus the console, is at the right angle so we minimize the reflections. A lot of times I see the speaker sitting right on the console. Not good.
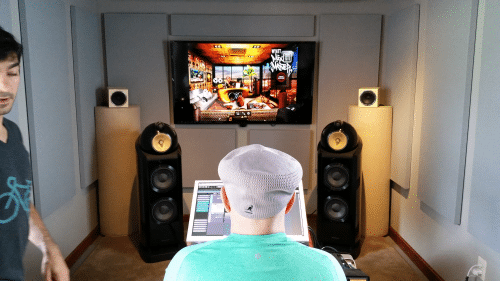
If you raise that speaker 12-inches the sound’s completely different so you want to find that magic area between your listening position, or your monitoring position/your ears, and the monitor and be very careful with that because that’s a huge coloration in your mix. You are actually interjecting a total quality into your mix that’s not there, by having your speakers positioned incorrectly. So comb filtering off the console you need to be very careful with that.
3. Don’t Work Around Pressure Issues in Your Room
I see this constantly with people. I go into a studio and they say “well I got a problem at 60 cycles, I got a problem at 80 and here’s what I do”. Well, they move their chairs. They go “it’s not over here, well it’s a little bit worse over here”. Those issues can be resolved. We do have the technology today to resolve them. If you’re going to spend 8, 10, 12, 14 hours a day in this environment producing income for yourself, why do you want to make your life more difficult? Identify the problems and treat them with the appropriate technology so that you’re not working around the issue.
Three Major Do’s and Don’ts When it Comes to Recording Studio Acoustic Treatment
Consistency in the monitors to the sidewall distance, that must be equal and the treatment must be equal. Monitors to console with comb filtering, be very careful with this. You don’t want to introduce any more noise into your mixes than there’s already there. I mean my gosh we have enough to deal with, with the room and the electronics, let’s not add any more to it on our own and don’t work around modal pressures you don’t need to today. You know there’s room dimensions, there are treatments available so identify the problem, find their location, and assign the appropriate treatment to them.
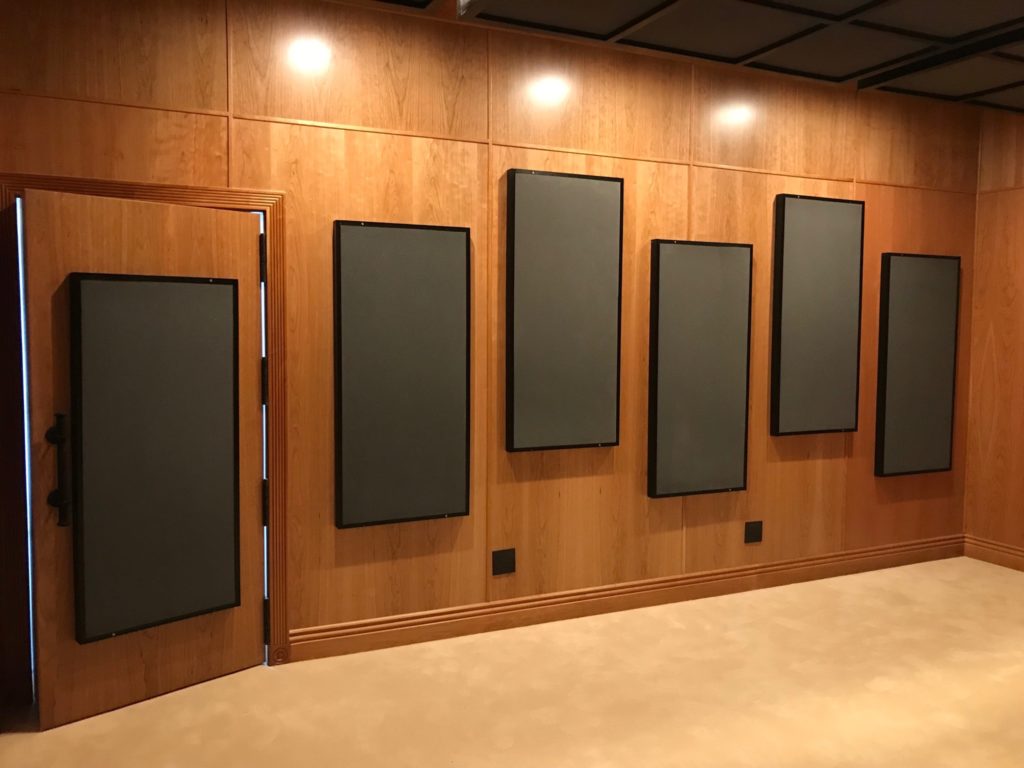
Treatment Types
Recording studio acoustic treatment types fall into two main categories. We have low-frequency and middle and high-frequency treatments. Both take the form of studio acoustic panels. One studio acoustic panel is designed for sound pressure which is for low-frequency energy and one studio acoustic panels are designed for middle and high-frequency energy. A low-frequency studio acoustic panel will be deeper or thicker in size since it has to deal with low-frequency energy. Another studio acoustic panel will be thinner since it deals with middle and high-frequency absorption. Both studio acoustic panels must be included in any studio room set up.
Low – Frequency Studio Acoustic Panels: https://www.acousticfields.com/product-category/sound-absorption/acda-series/
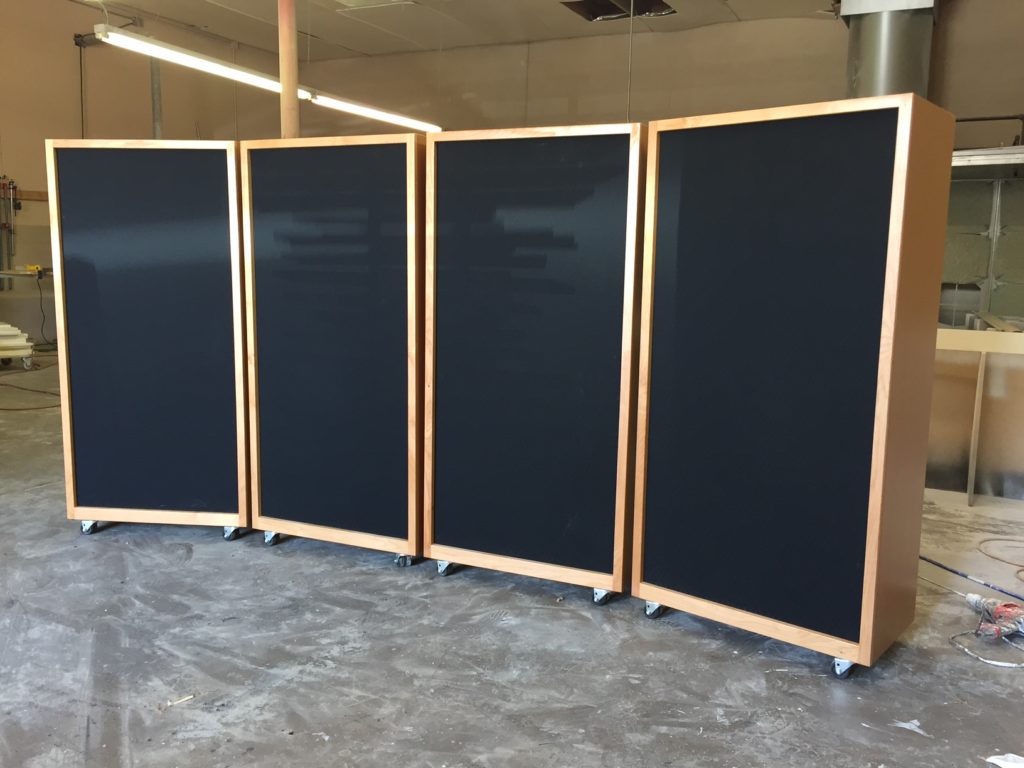
Diaphragmatic Absorbers
Middle and High-Frequency Absorption: https://www.acousticfields.com/product/acoustic-panels/
Acoustic Fields Foam Panel Technology

Learn More About Us At Acoustic Fields: https://www.acousticfields.com/about/
In Summary
I hope this discussion has helped answer any questions you make have regarding recording studio acoustic treatment. If you have any more questions or concerns feel free to contact me directly at: 520 – 392 – 9486 MST or info@acousticfields.com. If you would like to learn more about room acoustics please sign up for my free videos and ebook by joining the mailing list here. And if you want me to analyse your room please complete the form on this page https://www.acousticfields.com/free-room-analysis/
Thanks and speak soon
Dennis


Dear Dennis Foley,
I have recently moved to a townhome and am planning to acoustically treat a room for electronic music production.
The room is roughly 12’x10′.
I am new to treating a room and have been reading various website about this topic.
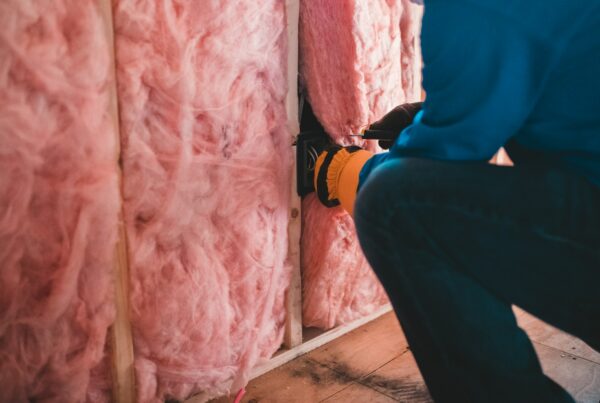
My current plan is to build bass traps with 4″ thick 705 owens corning insulation as tall as floor to ceiling and place them in the corners. Then remove two bifold closet doors and place a false wall of bass traps in front of the closet opening. This will be in the front of my monitors and desk. Then a trap behind me and one on either side. The sides will not be parallel to eachother because of the door/window layout of the room. The floor is carpeted and I have pictures and a sketch of the room layout if you would like to see them.
Could you give me some advice please as what is best for my work area?
Thank you, from Steve Giustini
S, These “bass traps” will not provide the proper rate and level of absorption for your small room. You must use diaphragmatic absorption. Cover the front and rear wall with broadband diaphragmatic absorption.
S, Electronic music in your small room size and volume will require diaphragmatic absorption for the low frequencies. A 4″ deep limp mass roxul panel will only absorb middle and high frequencies and it will over absorb that energy because of its rate and level of absorption producing dull and lifeless mid ranges.