There are a lot of people today who want or have a recording studio in home. We work with engineers all the time who after many years of working at other studios want their own recording studio in home. With your own studio where you can access anytime, creativity is fostered and can be manifested into action with a recording studio in home. When building a recording studio in home, you must focus on two main issues.
Building a Recording Studio at Home: Addressing Noise Transmission and Acoustic Treatment
You must address the noise transmission issues along with the absorption and diffusion treatment inside the room to manage the excess energy. This management is termed treatment. We have two main issues with any recording studio in home: noise and treatment. We must keep noise out of the room and on the flip side of that manage noise that we create within the room from leaving the room. This noise transmission issue is mitigated by using a barrier.
The Importance of Understanding Frequency and Amplitude in Building Effective Noise Barriers
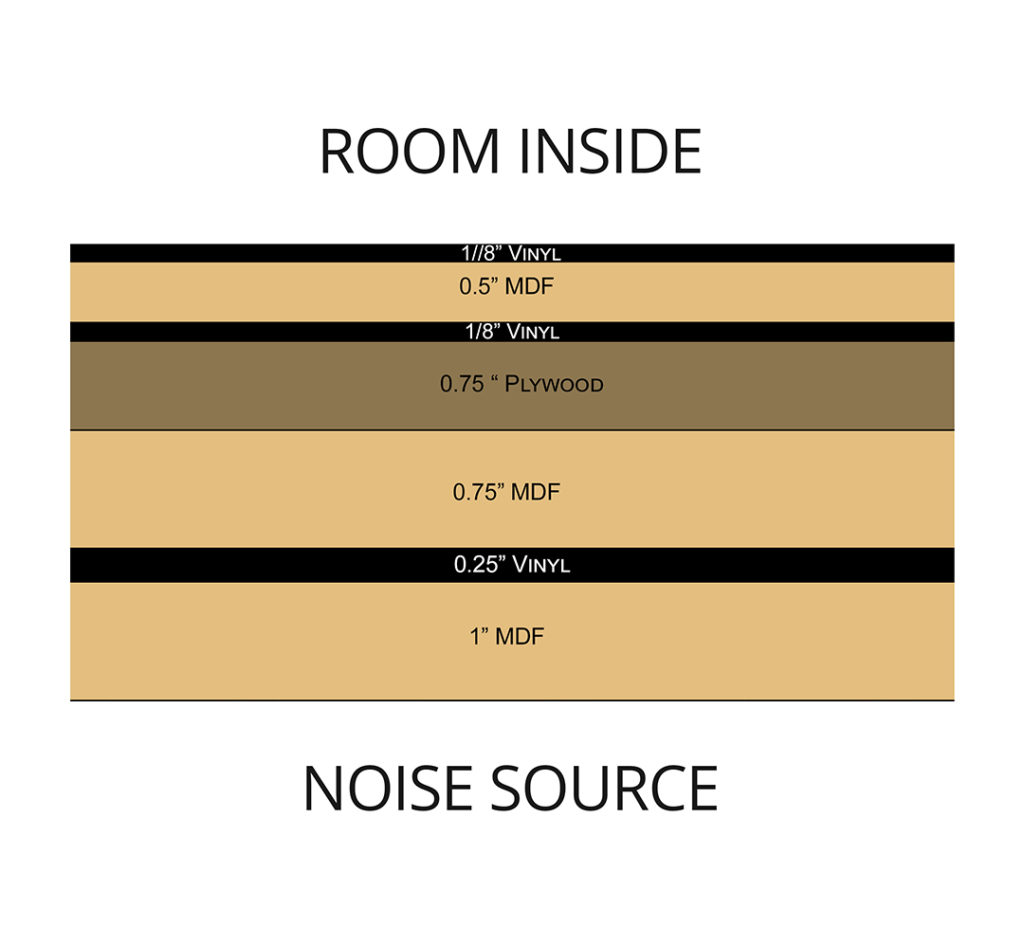
A barrier is a structure that you place between the source of the noise and the receiver. A barrier is dependent on the materials used, thickness of those materials and the construction methodology used. Everything within the barrier is dependent on the frequency and amplitude of the noise that we will be building a barrier against. We can think of the barrier as a castle where we are defending against an army that is standing outside ready to attack. We must know the frequency or in this analogy how many soldiers there are and what weapons they have. The weaponry is the strength or amplitude of each frequency.
When dealing with any noise issues, you must know the frequency and amplitude of the noise. With noise you must consider two main variables. You must not spend one dollar more than you have to with noise barriers. The reason for this is that any noise issue is a permanent construction fix. You are not leaving and taking the barrier with you. Secondly, you can not guess on what barrier type to build without noise numbers. Guessing with noise is foolish and expensive since a mistake means you will have to demo and start all over again. No one wants to do that.
Taking Effective Noise Measurements and Choosing the Right Barrier Materials
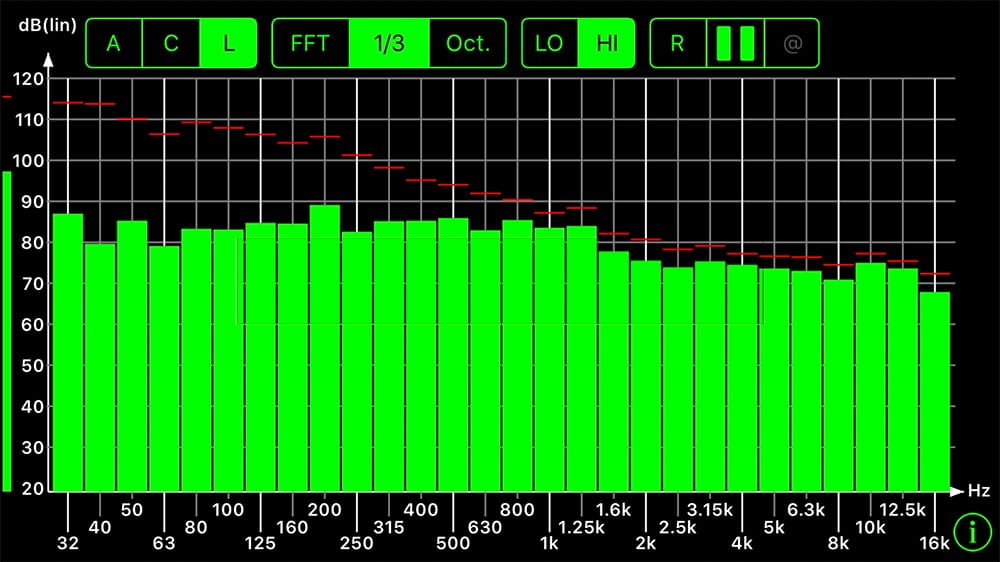
Noise numbers must be taken over a seven day time frame. This is critical so we can see the life of the noise over each day of the week in which the studio will be used. When we take noise numbers, we will take two readings each day. We will take frequency and amplitude readings over the quietest part of each day and we will take a noise measurement over the loudest part of each day. When we perform twice a day testing over seven days, we get a picture of the minimum and maximum pressures that will occur.
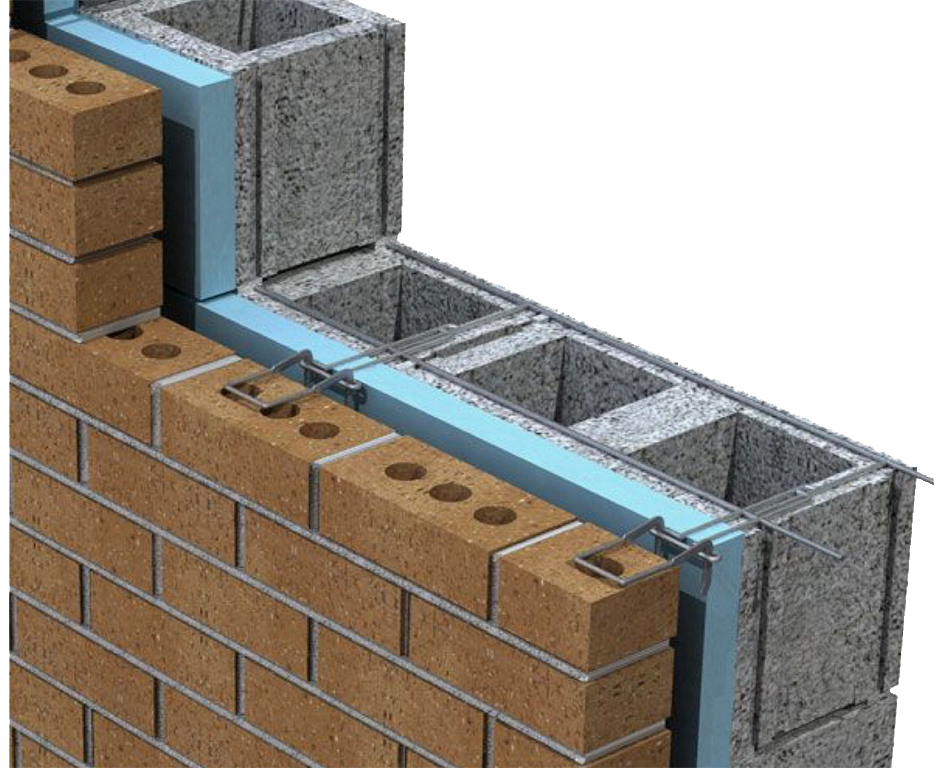
Noise issues above 125 hz. are dramatically different from noise levels below 125 hz. A barrier designed to mitigate noise below 125 hz. is much denser, takes up more space, and is expensive. Noise issues above 125 hz. are usually voice related and that barrier is thinner, takes up less space, and is much cheaper. Materials for noise below 125 hz. would be brick and concrete. Materials for noise transmission above 125 hz. can be wood based. At Acoustic Fields, we can assist you with any design process.
The Role of Frequency and Amplitude in Designing Effective Noise Barriers
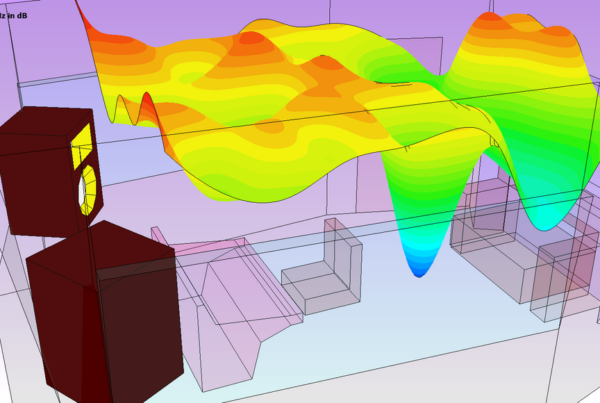
Your noise numbers will consist of frequency and amplitude. Frequency is where the noise lies on the audible frequency spectrum. Amplitude is how strong that frequency is. Once we know the frequency and amplitude numbers, twice a day, by using apps we send you to download on your phone, you record the data on our on line data sheet. You send the data to us and we design the barrier your numbers will require.
We send you a drawing of the barrier that you can build yourself or contract out. The barrier design will look at your maximum pressures, what day they occur and the minimum pressures at all frequencies. If we design for the lowest frequency of the noise at the maximum amplitude we will have achieved our design objective. Once you know the enemy, you can stop them or slow them down dramatically.
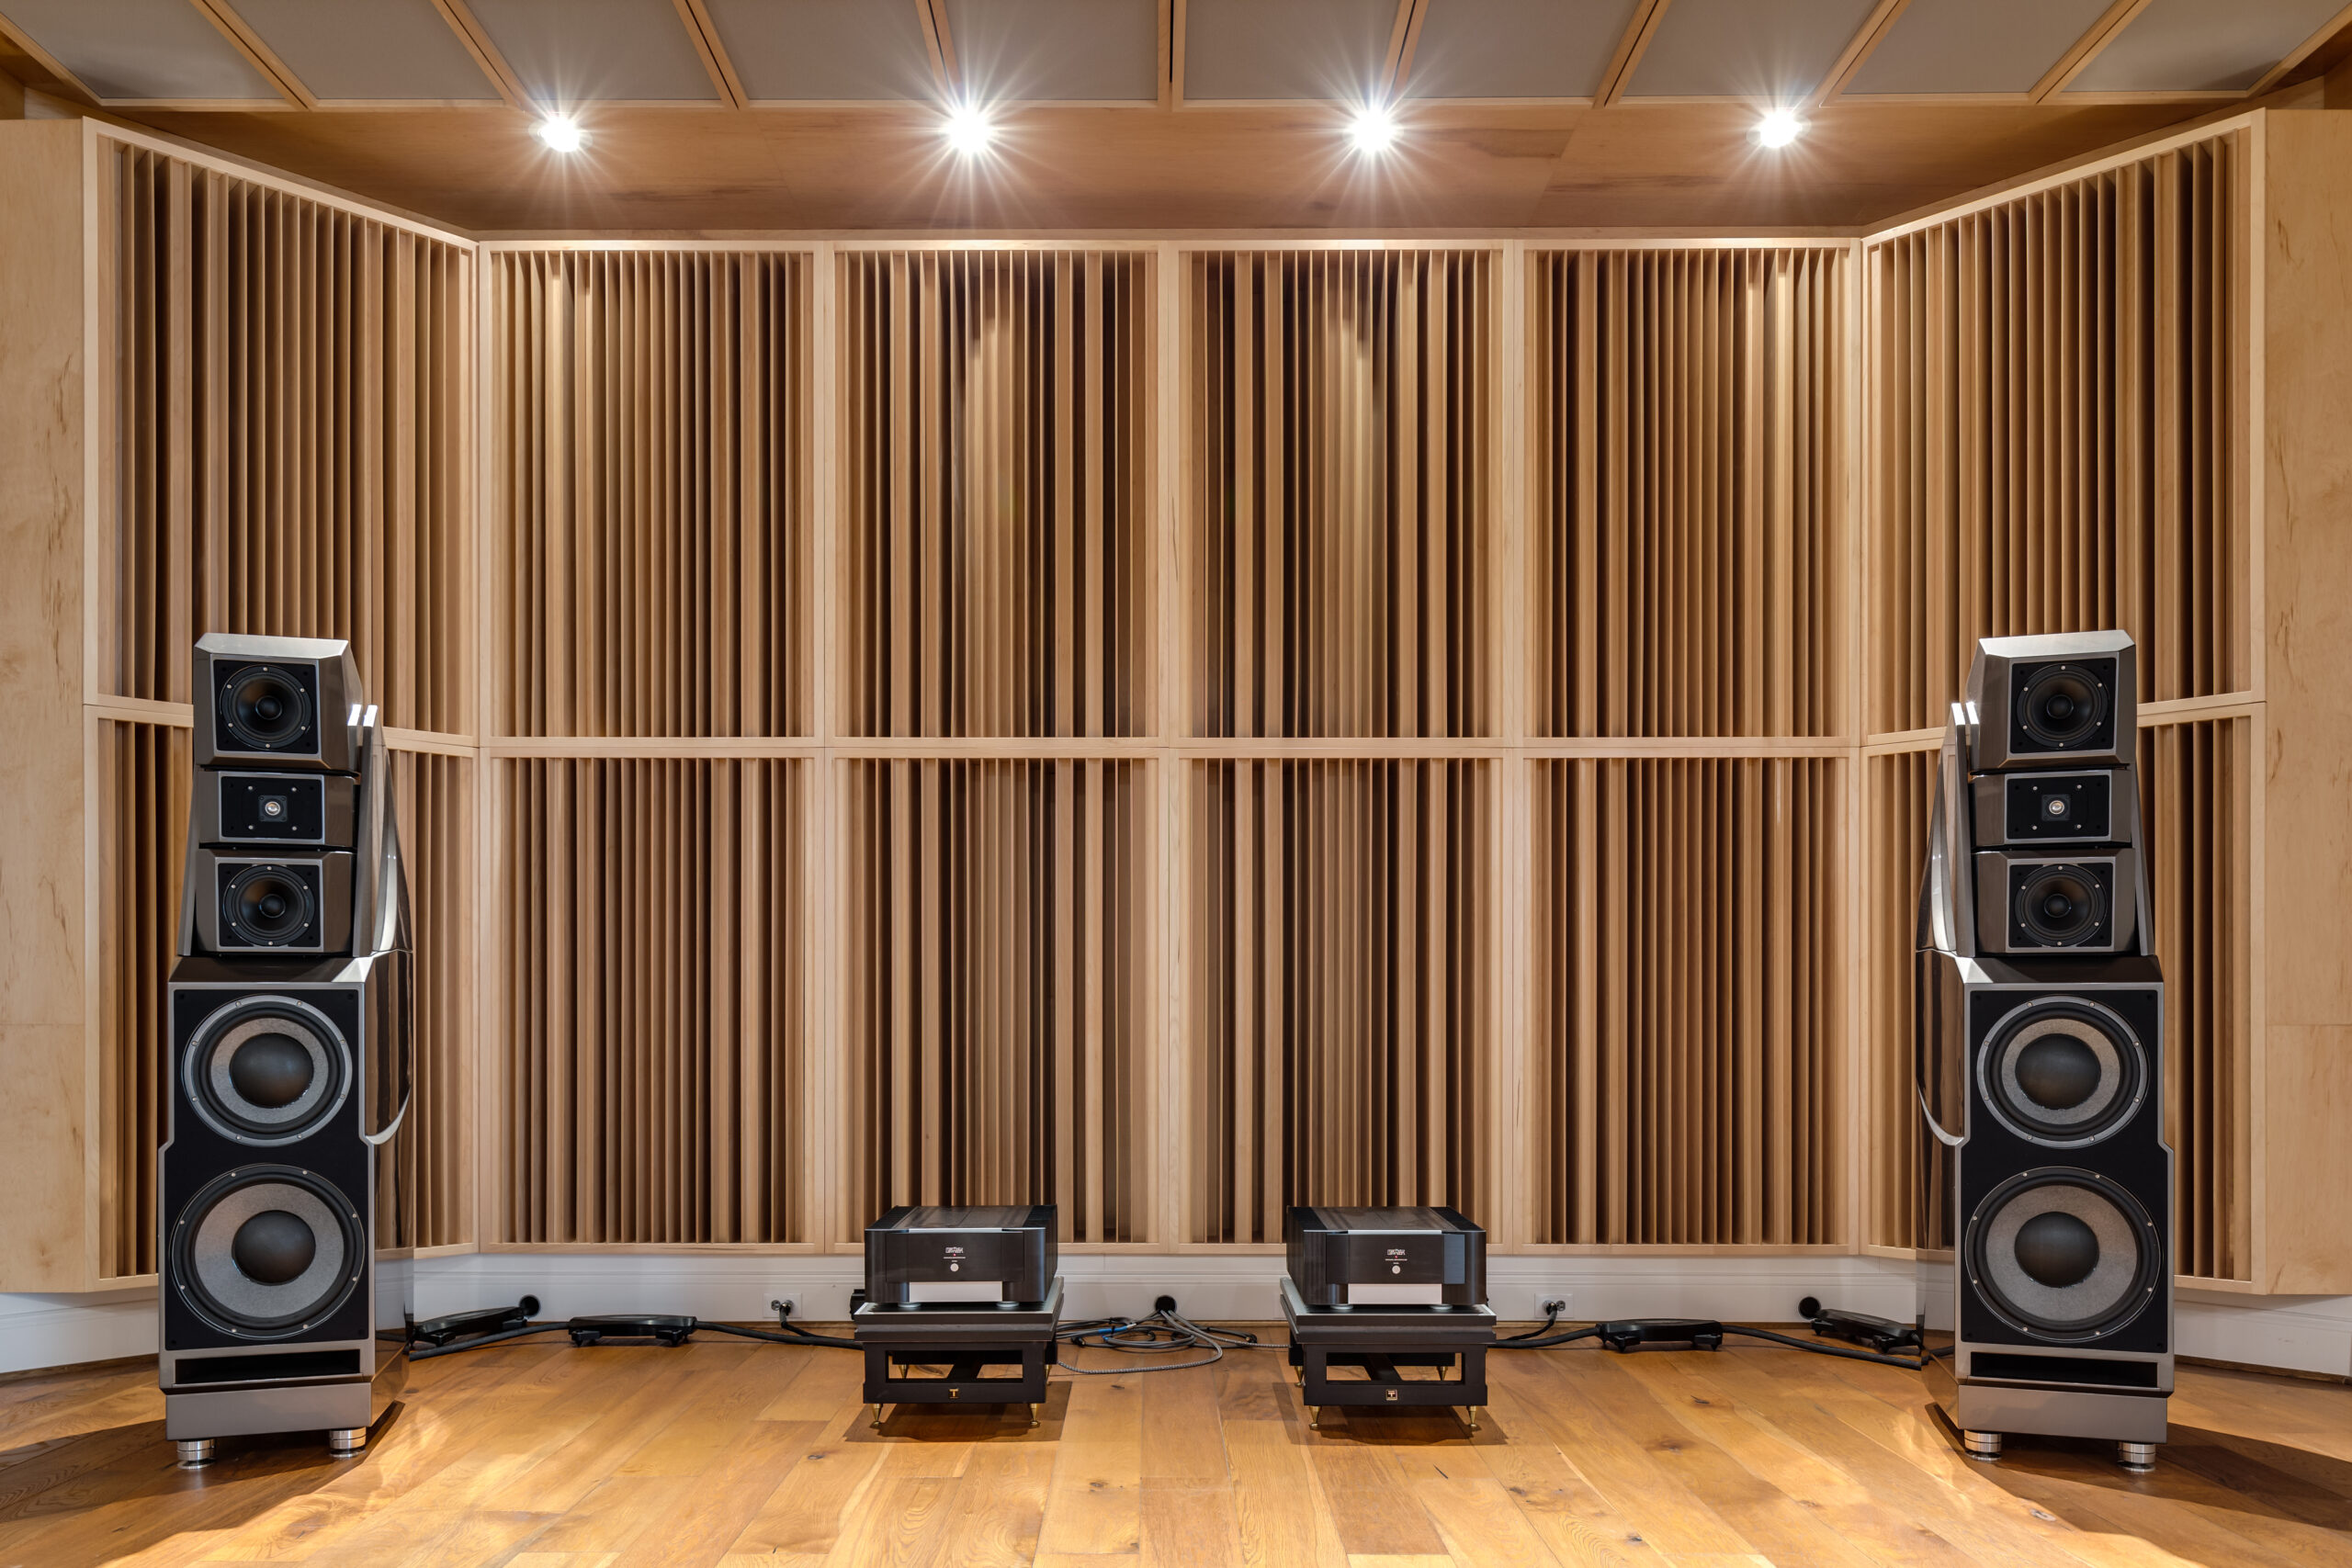
The Three Critical Layers of a High-Quality Listening Environment
A barrier design and build is really a new room inside the existing room or a new room with a shell that is the noise barrier. A critical listening environment has three main parts. It has an outside shell which is the barrier. The barrier design is based upon the noise measurements. The next layer inside the shell or barrier is the BTU wall. This is where you use R-Value insulation in order to keep the room warm or cool. The inside wall is the treatment wall. This is the structure where you place your low frequency absorption along with the middle and high frequency management. This is the part of the room that determines the ultimate resolution you will hear within the room depending on your chosen usage.
We keep the noise from entering and leaving the room with our barrier. We keep the room warm and cool to protect us from the elements. The acoustical tools go in the treatment wall. There are three separate walls with three completely different functions.