Diffusion is a popular way to minimize reflections that occur within our small rooms. We can also use absorption, but diffusion does not result in any energy loss as absorption does. Quadratic diffusion is a time tested and proven method of diffusion that is predictable and consistent. Quadratic diffusion can also offer us diffusion in multiple dimensions. Building your own quadratic diffuser is not complicated. This blog updated on 12 / 5 / 19 to reflect current thinking and experience.
Quadratic Diffuser
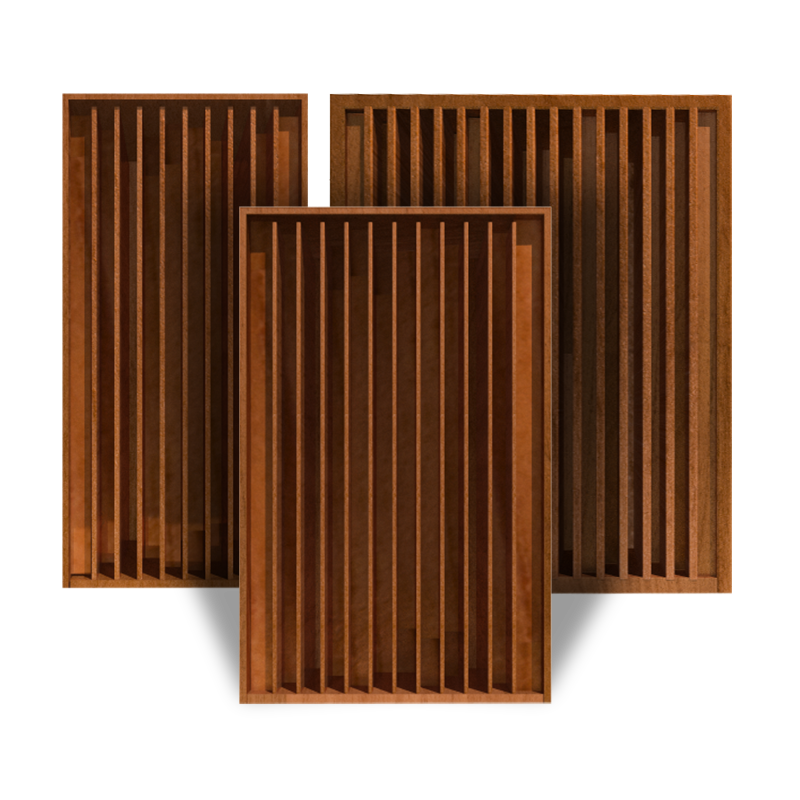
A quadratic diffuser is a series of wells or troughs that are of different depths. Each well depth is based on quarter wavelength calculations and the well width is based on half wavelength. A series of different depths can be calculated and designed to diffuse frequencies from 100 Hz. up though 4,000 Hz. or even higher. A diffusor that can diffuse energy down into the 100 cycle range, will need to be around 3′ deep with the deepest well. A 100 Hz. wave is approximately 12′ long, so at quarter wave, we are at 3′. This can present some space issues in our smaller rooms. We can control this variable by choosing a diffusor with a lower prime number.
Prime Number Sequence
Quadratic diffuser sequences are based upon prime numbers. The prime number chosen is then plugged into a formula and it produces a series of numbers that correspond to the different well or trough depths. The larger the prime number, the more frequencies that are built into the sequence and thus more frequencies to be diffused and a larger unit. Our goal is to try and get as much diffusion into the space limitations that we have in our rooms.
Planning First
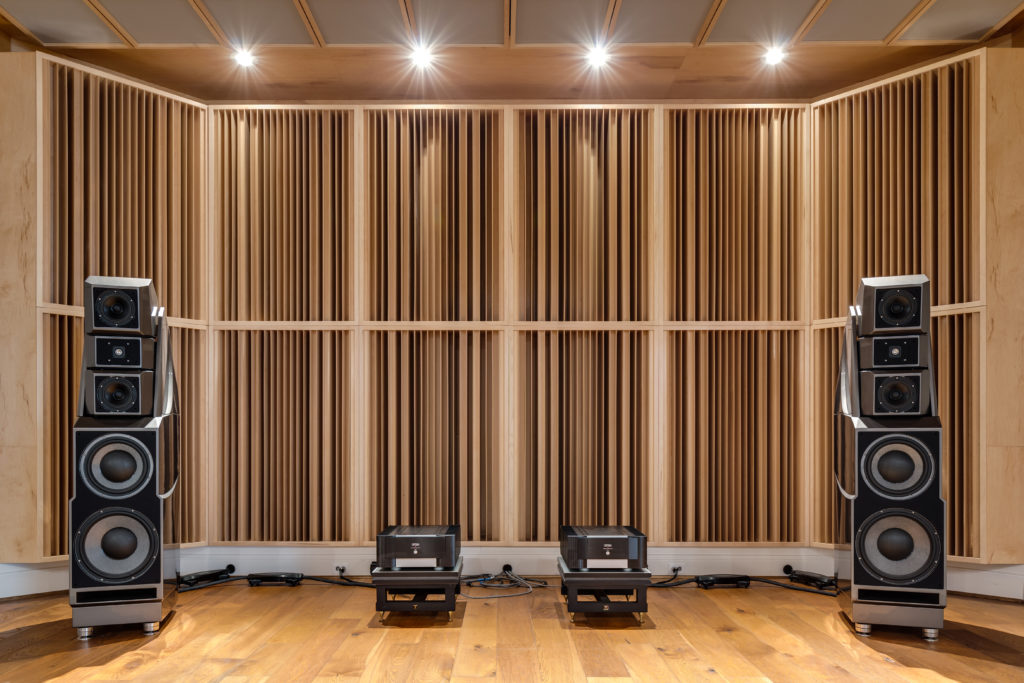
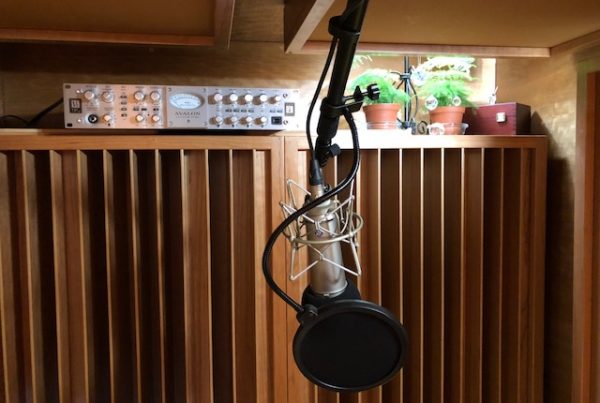
Building a quadratic diffuser requires us to first assess the area of our room we wish to place the diffusion technology on (i.e. Recording Studio, Home Theater, Podcast Recording Studio etc.). If we are in a control room, we need to address the rear wall, time-delayed, signal that leaves our monitors and strikes the rear wall. After striking the rear wall, it bounces back to us at the monitoring position and confuses the direct sound of our mix. To avoid this time delayed bounce back, diffusion is a good choice. The energy that leaves our monitors and then enters the diffusion on our rear wall, will be spread out in a fan-like array across a horizontal or vertical plane, with no reduction in strength. It is the next best thing to having no wall at all.
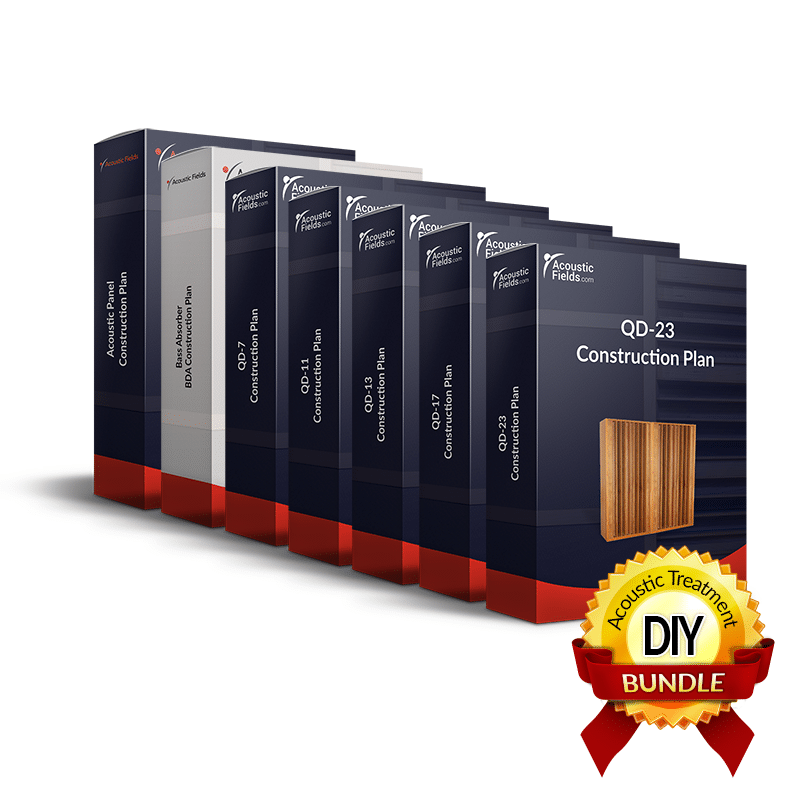
5 Acoustic Diffuser Build Plans Included In Our All-In-One DIY Bundle!
Meet the most advanced DIY acoustic treatment plans online! They include 5 sound diffuser build plans, 1 bass absorber build plan, and 1 acoustic panel plan. Developed by an industry leading expert, these plans offer the most affordable solutions for talented engineers and producers who don‘t want to spend thousands of dollars in order to achieve the sound of the big music companies.
Space Available
To choose our diffusion sequence, we need to look at the most space we can spare on the rear wall. Remember, the deeper the diffusor, the more frequencies we can diffuse, especially lower frequencies. If you have two feet space, choose a diffusion sequence based on a prime 19 or 23. If you have a foot to spare, you can choose a diffusion sequence based on prime 11 or 13. Either one of these 4 prime sequences will give you diffusion from approximately 375 Hz. – 3,500 Hz. It is the between frequencies that a larger prime will give you more of.
Vertical Well Dividers
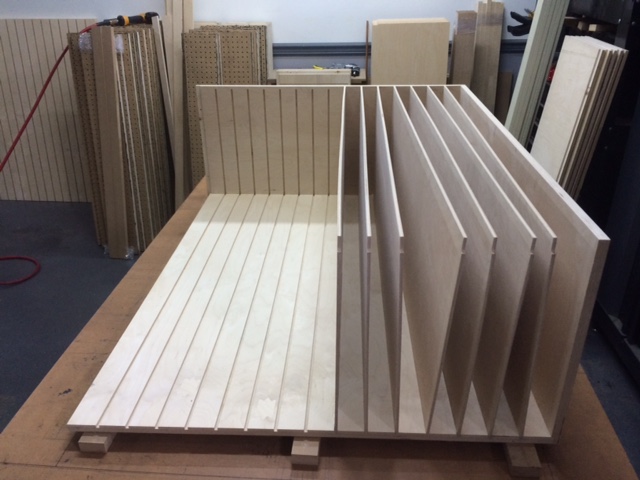
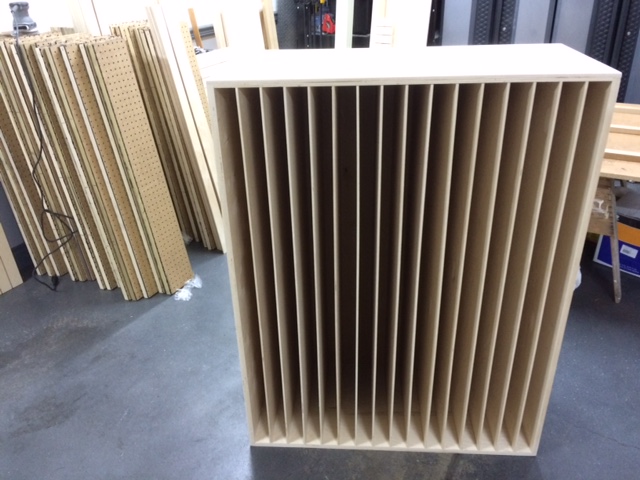
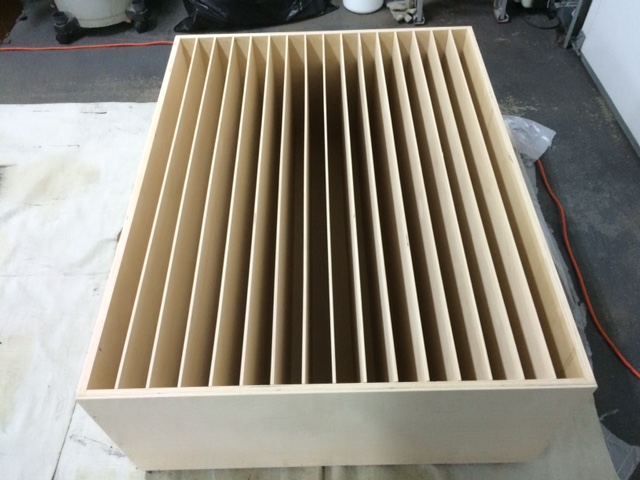
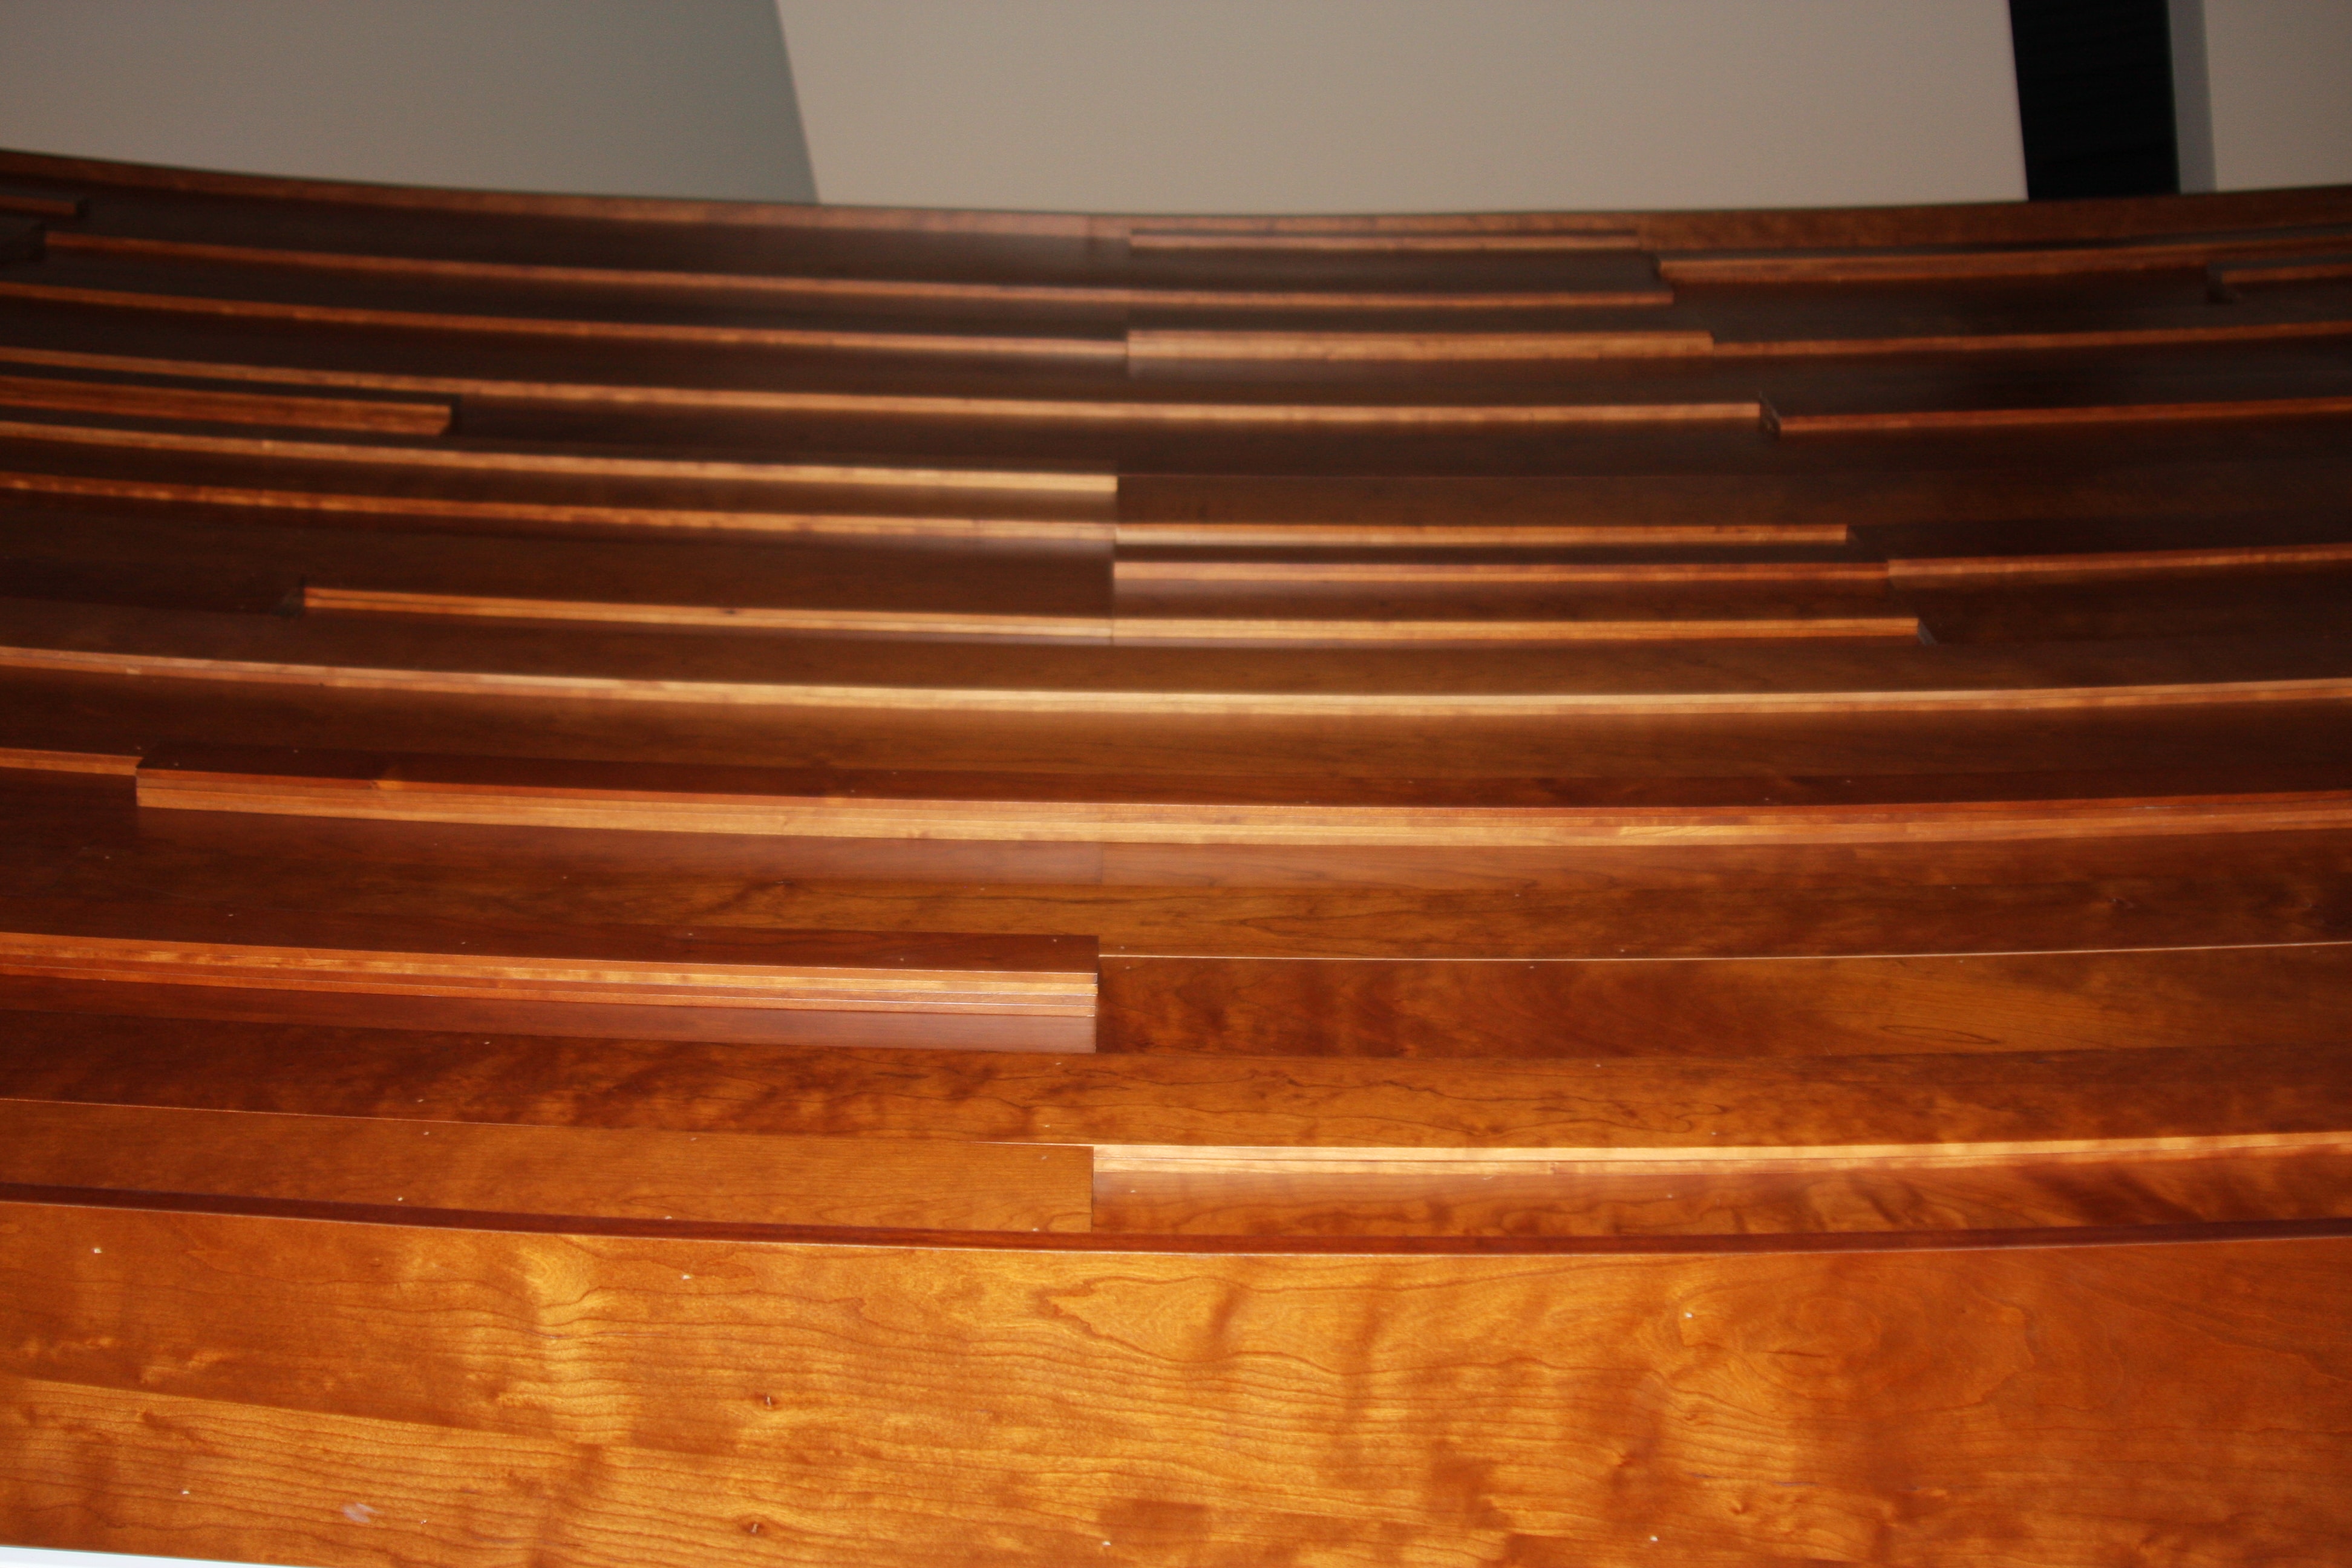
After you determine the sequence to use, you can start by cutting all your vertical well dividers. They are all the same size. You need to cut two less pieces than the prime number you have chosen. If you are building a diffusor based on prime 19, cut 17 dividers. You will have 18 wells or troughs with this sequence. The maximum well depth is always less than the prime number of the diffusion sequence. For a diffusor based on prime number 19, your maximum well depth will be 17″. All dividers need to be at least 17″ wide. The well divider also needs to be as thin as wood materials will permit. Using 1/8″ is best but not more than 1/4″.
Well Width
Determining well width is a little tricky, so for sake of explanation, we will use 2″ as our good width. We can make it smaller, say, down to 1″ width, but construction and assembly start to become an issue. With a 2″ wide well, it will be easier to measure cut pieces for each well. With 17 wells in our prime 19 diffusor, we will need 17 pieces. Each well depth needs to start with a depth of 1″ in the well right next to the cabinet edge and repeat this depth in inches sequence: 1, 4, 9, 16, 6, 17, 11, 7, 5, 5, 7, 11, 17, 6, 16, 9, 4, 1. The unit will end up around 35″ across and about 18″ deep.
Diffusor Assembly
It is best to assemble the wells of the diffusion sequence first and then insert it into a cabinet that you have built. Solid wood provides the best sound for your diffusor construction. Solid, soft, woods have the best sound with a higher density hardwood for the well dividers. Make each unit at least 4′ tall and finish the wood with a stain or just a clear coat to seal the finish against dirt and hand oils. Painting along with any other wood surface treatment can be used.
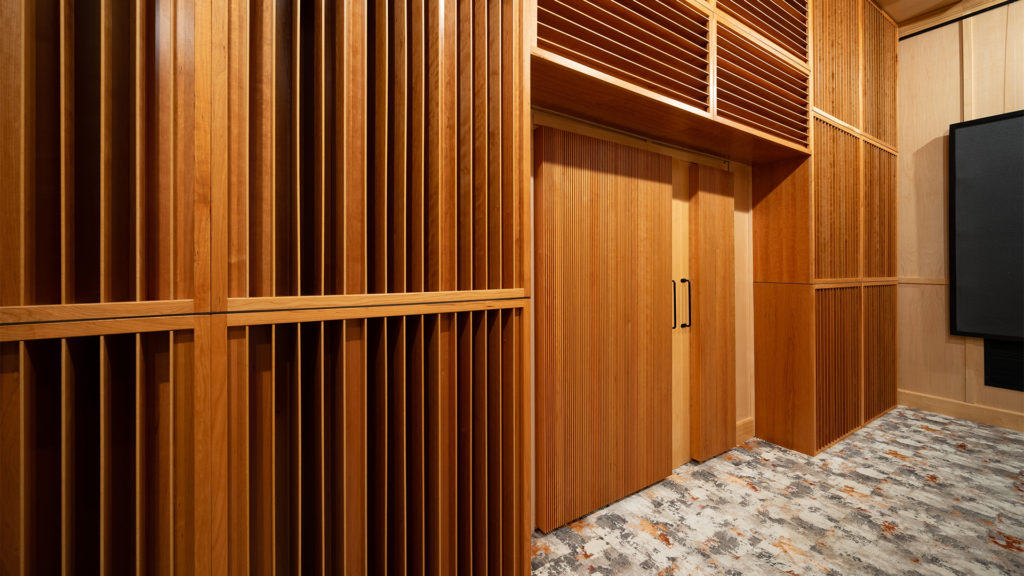
Positioning
Position the units vertically across your rear control room wall. This will provide horizontal, fan-like diffusion, across the whole room but more importantly, at the monitoring position. You may want another dimension of diffusion added to the horizontal you just installed. If so, place more prime 19 diffusers on top of the already installed vertical diffusers. Place these diffusers horizontally, directly on top of the existing diffusers. You will now have two dimensions of diffusion at the monitoring position, both vertical and horizontal planes.
Build Your Own
Building a quadratic diffuser is not difficult if you do a little planning ahead of time. Find out what space you have available on the wall you wish to treat with diffusion and build the deepest diffusor you can that will fit into your space requirements. If you want assistance with all of this and want to build your own, you can. Go to our All-In-One Acoustic Treatment Build Plans page, where you can download your very own plans. Here you will find build drawings, assembly instructions, cut sheets, material lists, and even the required tools listed. Each step by step instructions is accompanied by an actual photo of a unit being built.
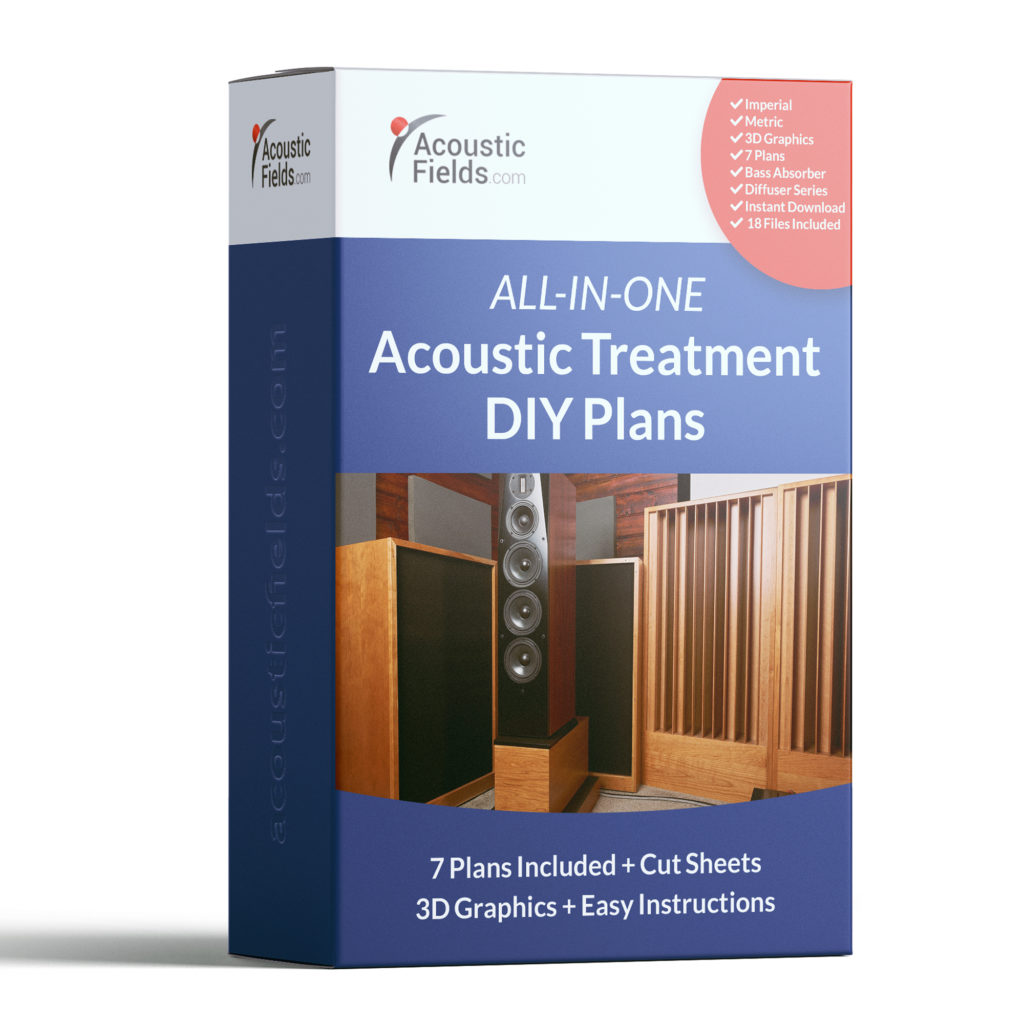
Our All-In-One DIY Build Plans Bundle includes 5 sound diffuser build plans: https://www.acousticfields.com/product/all-in-one-diy-acoustic-treatment-build-plans-package/
In Summary
I hope this explanation helped. If you would like a free analysis of your room, please complete the form on this page https://www.acousticfields.com/free-room-analysis/ and we will run a free analysis for you. If you want to learn more about this subject please sign up for our free room acoustic treatment videos and ebook which provide step by step instructions. Get instant access by signing up now.
Thanks
Dennis
Learn More About Us At Acoustic Fields: https://www.acousticfields.com/about/


Hi Dennis, thanks for all the good material you put out, it’s been really helpful. I’m looking at qrdude to get my diffuser dimensions and it says that for higher order diffusers you can use a smaller well width and get higher frequency diffusion. Is this a good way to get a diffuser that will cover high frequencies?
S, You must first decide what the sound strategy for the room is going to be. Diffusion is a tactic to achieve a decided upon sonic strategy. s Diffuser frequency response dependent upon usage and distance from diffusers to the listener’s ears.